
A small float can reveal more about mullet than a heavy bottom rig. You see the direction of the surface drift, can change the bait's depth by centimetres, and can move with a school without repeatedly anchoring a sinker in the weed. On the lower Derwent, the useful starting point is a quiet, permitted shoreline beside sand or the edge of seagrass.
Yelloweye mullet are a light-tackle target in their own right. This guide is a suggested late-spring and summer learning session, not a promise of a seasonal run. Fish may be visible near the surface yet feeding on material too small to resemble a hook bait; visible fish are an invitation to experiment, not a guarantee of bites.
Identify the mullet, then consider its food
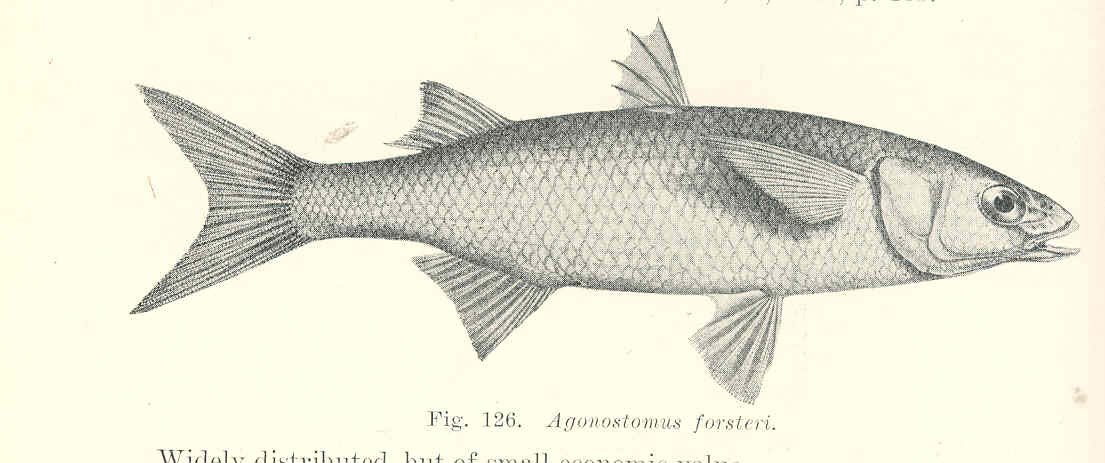
Yelloweye mullet, Aldrichetta forsteri, have an elongated body, a comparatively narrow head and a conspicuous yellow iris. The back is greenish-brown, the underside silvery to yellowish. Their two dorsal fins are separate. Larger-headed sea or grey mullet are different fish; do not transfer a limit or identification from another country's use of the word mullet.
This species occurs in Australia and New Zealand. Its inshore habitat includes estuaries, sandy bays and sandy ground beside jetties or rocks. Yelloweye mullet can feed on sandworms and small shellfish near the bottom, while surface activity may involve plankton. That variety is the reason to test several levels before concluding that a school refuses every bait.
Use small, soft baits with an exposed hook point. A short piece of legally sourced marine worm is a direct starting option. A tiny pinch of bread is an alternative presentation to test, not evidence that bread is a natural food or that local fish are conditioned to it. Do not harvest shellfish or bait from restricted ground simply because fish feed on those organisms.
Pick a small, fishable section of the Derwent
The official Derwent guide lists places including Sandy Bay, Taroona, Blackmans Bay, South Arm Jetty and Opossum Bay Jetty. They are access-planning examples, not interchangeable mullet hotspots. Check signs, current public access and whether you have room to cast without obstructing walkers or boats.
For a first session, look for a sheltered section of one of those lower-estuary locations where sand is visible and the near margin can be fished safely. A jetty edge can place you above the water, but a low bank or beach often gives easier landing and less wind exposure. Avoid fishing from a high position unless your net reaches the water.
Watch before introducing bait. Note whether fish travel parallel to the shore, circle a patch or repeatedly disappear at a darker edge. A colour change may indicate weed, depth or shade, so verify the retrieve lane gently rather than assuming it marks a channel. Cast beside visible fish instead of dropping tackle into the middle of the school.
Tidal movement can carry food and your bait along the same route. A rising water level may open a shallower margin, while falling water can concentrate your attention on the nearest remaining depth. Neither stage wins everywhere. If wind pushes the float faster than the water beneath it, line management becomes more important than the tide label.
Assemble a light, forgiving outfit
A 2.1–2.7-metre light spinning rod, a 1000–2500 reel and 3–6-pound nylon make a useful starting outfit for sheltered edges. Nylon's manageable stretch is helpful with small hooks. If using fine braid, add about a metre of light leader and avoid striking sharply. Around rough jetty fittings, increase abrasion resistance or choose a cleaner landing position.
Use size 12–8 single hooks, chosen to match the bait rather than the largest fish you hope to catch. Hook numbering differs by pattern, so check the actual gape. Carry a few small floats, soft split shot, a depth-plumbing weight and a fine-mesh landing net.
The following depths, weights and timing are practical trial settings. They are not measured local optima. A float needs enough capacity to cast and stay visible, but excess buoyancy forces a fish to pull against unnecessary resistance. Start with a slender 1–3-gram float in calm water and increase only when conditions demand it.
Rig one: a fixed float for the near margin
Attach a small fixed float to the mainline using its appropriate silicone or bottom-eye attachment. Add soft shot gradually below it, with most of the load well above the hook and one small settling shot roughly 15–25 centimetres from the bait. Finish with a 25–40-centimetre light hooklength if you want an easily replaceable terminal section.
Set the float initially about 50–100 centimetres above the hook. In a visible shallow margin, use a small plummet briefly to establish depth, then set the bait to pass just above the bed or weed. Remove the plummet before fishing. Where fish are visibly higher, shorten the depth instead.
Pin a tiny worm section once or twice, leaving a little movement and a clear point. For bread, pinch it around the shank while allowing the bend and point to remain functional. Test beside the bank to see whether the bait survives immersion and whether the float is overloaded.
Cast slightly up-drift of the intended lane. Close the bail, lift spare line clear of the water and follow the float with the rod tip. Feed a little line when necessary so the bait travels naturally. Pulling the float toward you makes the bait accelerate and climb; excessive slack makes a small bite difficult to answer.
A dip that continues, a sideways draw or a float that lifts unexpectedly can indicate a take. Wind out the slack and raise the rod gently. Do not wait for the float to disappear for several seconds, and do not make a forceful overhead strike with a tiny hook.
Rig two: a sliding float for deeper water
When the required depth approaches or exceeds your rod length, slide a small stop knot onto the mainline, followed by a bead and a sliding float. Below the float, add the shot needed to cock it, then a small swivel and a 40–60-centimetre hooklength. The stop knot determines depth while the float slides down for casting.
Start with a slightly larger 3–5-gram float if that is what the extra depth and casting distance require. Keep the lowest shot clear of the hook so the bait has some freedom. Check that the bead cannot pass through the float's top eye and that the stop knot travels through the rod guides without snagging.
After the cast, allow the terminal tackle to sink until the float reaches the stop. An immediate dip before the rig has settled may be the weight still descending. Learn that settling pattern in clear water first. Then increase depth in small steps until the bait reaches the band where bites or fish activity occur.
If the float drifts into weed, do not merely add more lead. Reduce depth, shorten the drift or cast farther to the clean side. If it lies flat unexpectedly, the rig may have grounded on a rising patch; it may also be a lifting bite. A gentle check and the next cast help distinguish the two.
Choose a response rather than a new bait at random
| Observation | Likely presentation issue to test | First change |
|---|---|---|
| Fish visible above the bait | Hook is below the active layer | Reduce depth by 20–30 centimetres |
| Float races sideways | Wind is towing the line | Lift or mend the surface line and shorten the cast |
| Bait returns with weed | Rig is fishing too deep or too far into vegetation | Raise the bait and move to the clean edge |
| Small taps, no hooked fish | Bait may be oversized or hook masked | Use a smaller piece and expose the point |
| No fish visible and no bites | School may be elsewhere | Move to another permitted stretch before overfeeding |
A worked session at a sheltered lower-estuary margin
Choose a calm, publicly accessible section near Sandy Bay or another listed lower-estuary location after checking the actual conditions. Begin without feeding. Watch for ten minutes and make a shallow test cast to learn drift direction. Suppose the float travels parallel to shore over clear sand before entering a dark patch: finish the drift before that patch until you know what it is.
Use the fixed rig with a small worm piece. Make several passes at one depth, then repeat a little deeper. A single fish does not establish a pattern, but repeated bites at the same part of the drift justify concentrating there. Mark the float setting so you can return to it.
If trying bread, introduce only a few small crumbs where permitted and watch whether fish respond. Avoid repeated handfuls. Heavy feeding can draw birds, leave litter-like scraps and make it impossible to tell whether your hook bait is useful. Stop feeding when it produces no visible benefit.
After a quiet spell, compare the next clean patch or a slightly deeper lane with the slider. Give the change enough casts to be meaningful. At the end, record depth, drift direction, bait size and where bites occurred, rather than only the total catch.
Rules and care that matter here
Fishing Tasmania currently lists a combined mullet minimum of 25 centimetres, a daily bag of 15 and possession of 30. Marine rod-and-line fishing does not require a sea-fishing licence, but inland-water rules differ. Check the boundary, area restrictions and current limits before the trip; this is not a guide to net fishing.
The Derwent has a heavy-metal contamination advisory: do not eat local shellfish or bream, and follow official limits for other scalefish before retaining mullet. This guide favours a learning-and-release session. Keep fish wet, minimise handling because scales dislodge easily, and unhook close to the water. Avoid slippery edges and crowded casting lanes; a sheltered position that lets you see the float is usually the better fishing position too.