
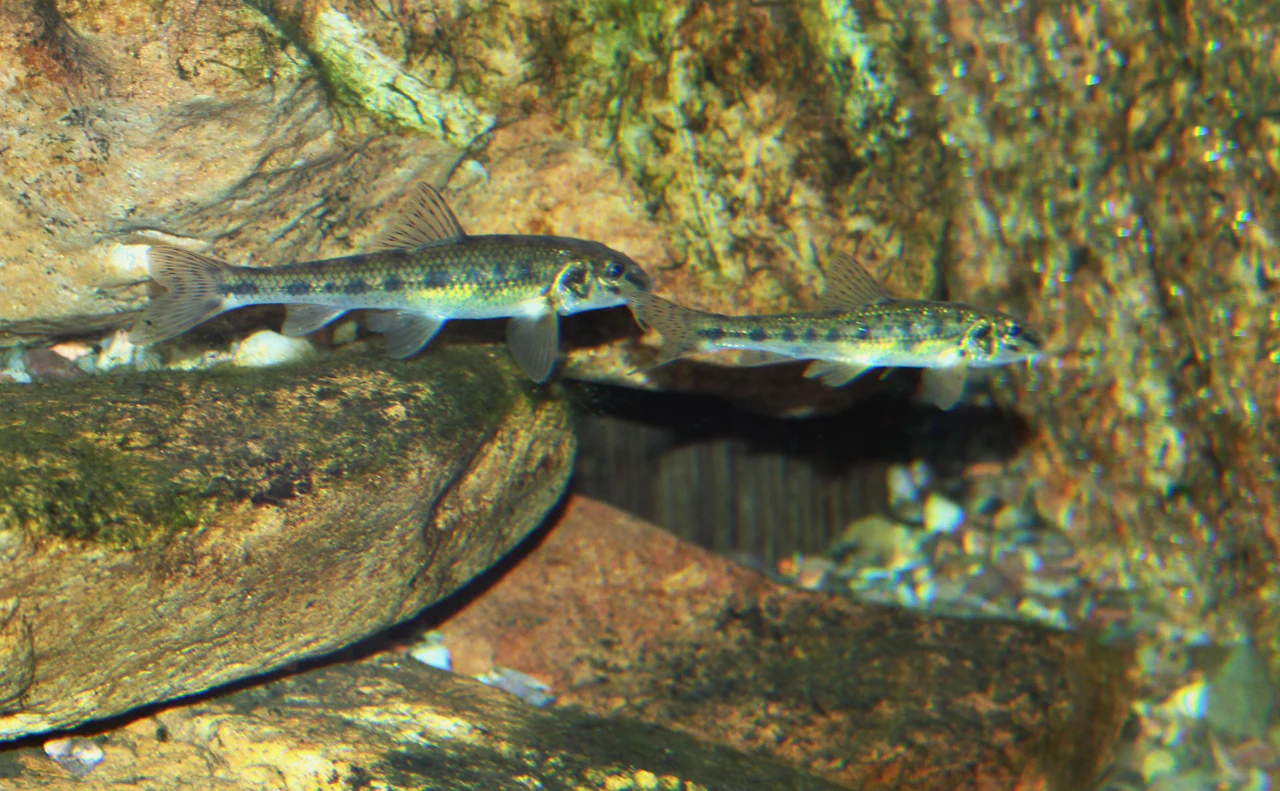
A gudgeon session on the Shropshire Union is an exercise in small-scale accuracy. The fish may be close enough to reach with a short pole, yet a bait suspended well above the bottom can miss them. Establishing the depth, presenting one tiny bait cleanly and repeating the same line are more useful than immediately fishing the far bank.
The Croughton area offers a concrete place to build this plan. Published club information lists gudgeon on the canal around Backford, Pretty Bridge and Croughton and on the continuation toward Meadow Lane Bridge. This is a planning guide based on those fishery descriptions and species research, not a report of catches made this week. All tackle dimensions and test timings below are practical starting suggestions.
Recognise the fish and its feeding zone
Gudgeon, Gobio gobio, are small, elongated bottom feeders with a downward-facing mouth and one pair of barbels. Their mottled back and darker flank markings help distinguish them from a plain silvery roach. Young barbel have two pairs of barbels, not one. Topmouth gudgeon is a different, non-native fish and must not be identified simply because its name contains the same word.
Gudgeon occur in rivers and canals rather than exclusively in one kind of flow. Within Britain, the Shropshire Union is specifically recognised as a canal where they remain well represented. Their food includes bottom-dwelling insect larvae, crustaceans and molluscs. A small bait placed on or just above the bed therefore makes biological sense without needing to imitate a particular insect hatch.
The fish’s small mouth and feeding position explain two common failures: a hook bait too bulky to take easily, and a float set to fish too high. Correct those before concluding that the swim contains no fish. Shoaling behaviour makes a repeatable feeding spot useful, but it does not guarantee that every bridge or mooring holds a shoal.
Choose the permitted stretch before choosing a swim
Lymm Angling Club’s published information describes affiliated fishing from Backford Bridge 133 through Pretty Bridge 134 toward Croughton Bridge 135, and onward from Croughton to Meadow Lane Bridge 139. It lists access through qualifying club affiliations. Check the current membership terms and exact stretch with the controlling club before travelling; a towpath is not free fishing, and a general Waterway Wanderers permit does not automatically cover club-controlled water.
Choose a legal position that leaves the towpath clear and gives room for a landing net. Do not assume roadside space mentioned in an older access description is still lawful or available. Follow current parking signs, avoid private moorings and do not block bridge approaches. A comfortable, unobstructed swim allows more accurate fishing than a cramped gap chosen only because it looks fishy.
From the bank, examine the near shelf before considering the far side. The shelf-to-channel transition is a hypothesis to test with a plummet, not a fixed depth that can be read from the width of the canal. Boat passages, maintenance and accumulated silt make one swim different from the next.
Map a small area rather than guessing
Clip a suitable plummet onto the hook and lower the rig at several points along a narrow line. Set the float so its tip just shows when the weight rests on the bed. Repeat slightly nearer and farther away. You are looking for a usable depth change and a reasonably clear patch, not trying to draw a complete bathymetric map.
Do not mistake soft silt for firm bottom. If the plummet sinks in deeply, the bait may fish too far below the intended level when you remove it. Compare the setting with a lighter sounding weight where appropriate, and retrieve the bare hook to check for debris. Start with the bait barely touching or just clearing the bottom rather than laying a long length of line on it.
A small downstream or along-canal drift can bring the bait past fish. Excessive movement, however, carries the bait out of the tested patch. Watch a free-floating leaf or the unbaited float to learn whether wind or water movement is dominating. This observation determines float capacity and shot distribution more usefully than choosing a rig because it worked somewhere else.
| Condition or feature | First choice | Presentation aim | Adjustment |
|---|---|---|---|
| Near shelf with a clean patch | Short pole float | Lower bait vertically onto the tested line | Change depth by a few centimetres |
| Deeper shelf edge | Slightly heavier pole float | Keep bait close to bottom | Move the shot bulk lower if the bait descends too slowly |
| Fish beyond comfortable pole reach | Light waggler | Reach the line without excessive disturbance | Sink surface line and shorten casts |
| Strong tow after a boat | Pause and reassess | Avoid dragging bait through debris | Re-plumb if the float behaves differently |
| Tiny bites without hook-ups | Smaller bait and exposed point | Let the fish take the hook bait cleanly | Check hook condition before changing the swim |
Assemble the short-pole rig
A whip or short pole around 3–5 m is enough for many near-side tests. Select a light elastic if using an elasticated pole and match it to the hooklength; this is not a carp extraction setup. Start with main line around 0.12–0.14 mm and a 15–25 cm hooklength around 0.10–0.12 mm. Diameters are more comparable than brand breaking-strain claims, but check the actual line’s rating and condition.
Fit a small pole float, perhaps 0.2–0.5 g in sheltered water, using its intended eye and silicone attachments. Arrange most of the non-toxic shot roughly 25–40 cm above the hook, with one or two small droppers below. Leave the final stretch near the hook unobstructed. Adjust shot until only enough tip remains visible to read bites.
Tie a fine-wire size 20 or 22 hook where the local rules allow it. Begin with one maggot, lightly hooked so the point remains clear. A tiny piece of worm is an alternative, but it should not turn the small hook into a bulky bundle. Carry a disgorger suitable for small fish and keep the landing net close, even if most catches look easy to lift.
Lower the rig instead of swinging it hard against the water. Keep a short, manageable length of line between pole tip and float. Too much slack delays the strike; too little can drag the float every time your hand moves. Aim to hold the rig naturally over the plumbed patch rather than pinning it against a current it cannot resist.
Feeding and bite detection
Begin sparingly, where feeding is allowed: a few small loose baits placed accurately are a better experiment than an immediate large ball of groundbait. The goal is to establish a compact feeding line, not fill fish before they find the hook. If using fine groundbait, mix a small quantity and introduce little portions only after observing a response.
Let the bait settle fully. A float may dip, travel sideways or rise as a fish lifts the lower shot. Make a short upward lift when the movement becomes positive. Do not strike repeatedly at every vibration caused by wind. With tiny hooks, a restrained response usually gives better control than a wide sweep over your shoulder.
If you miss several bites, examine the maggot and hook point first. A crushed bait suggests contact; a tangled hooklength or masked point suggests a presentation problem. Shorten the bait, replace a damaged hook and try again at the same depth. Changing location immediately discards useful evidence that something is feeding.
Once bites become regular, feed a similarly small amount after a few fish or when activity fades. If extra feed stops the bites, stop adding more. There is no obligation to maintain a feeding rhythm merely because it sounded sensible before the session began.
A light waggler for the second line
Use a 3–3.6 m float rod with a small fixed-spool reel and roughly 3–4 lb nylon when the productive line is beyond comfortable pole reach. Attach a slender waggler by its bottom eye, locked with suitable shot or a purpose-made adaptor. A float carrying approximately 1–2 g is a starting option; choose enough capacity to cast accurately without excessive splash.
Place most loading around the float attachment and use a few small droppers down to a 20–30 cm fine hooklength. Start with the same hook and bait used on the pole so the main comparison is location and control. Set depth from plumbing rather than transferring the near-side setting to a different distance.
Cast slightly beyond the target when the water is clear of boats and other users. Stop the line before the rig lands, dip the rod tip and reel gently to sink surface line and draw the float onto the intended lane. Avoid repeatedly pulling the bait away from the feed. If wind moves the line faster than you can control it, shorten the cast or return to the pole.
A waggler is not automatically better because it reaches farther. Its value is access to a second tested depth, while the pole’s value is precise placement. Choose between them according to the lane that produces clean presentations and readable bites.
Work through a ninety-minute session
Spend the first ten minutes checking permissions, selecting a clear swim and plumbing the near shelf and its outside edge. Start with a single maggot and the lighter pole float. Fish one compact patch for roughly fifteen minutes, testing the bait just clear of bottom and then barely touching it. These are organisational timings, not predicted feeding periods.
If there are bites but few fish, solve bait size and hook-point problems first. If there are no bites, try the next depth line with the same bait. A deeper edge may require a slightly larger float and a lower shot bulk to keep the bait where you intend. Write down the effective float setting rather than relying on memory.
After a boat passes, lift clear of the vessel and let the disturbance settle. Recheck whether the float returns to its previous behaviour. Muddy water or temporary tow is not proof that feeding has stopped, but neither is it a guaranteed trigger. Resume with a small, accurate feed and reassess.
Use the waggler for a short comparison only if the farther line is both legal and unobstructed. If both methods remain blank, move to another permitted swim with a different shelf profile rather than adding increasingly large amounts of bait. The useful lesson is which presentation you actually tested, not how much equipment you carried.
Rules and care
An Environment Agency rod licence is required from age 13, with free junior licences for ages 13–16, alongside the fishery permission. Most canals allow year-round coarse fishing, but local byelaws and club restrictions still apply; do not extend that statement to adjoining rivers. Check current club bait, hook and fish-return rules before fishing.
Keep the towpath open, lift tackle clear of boats, wet your hands before handling fish and return catches promptly where required. Never transfer fish between waters. A precise, lightly fed session can teach depth control, bite recognition and rig adjustment without turning a small canal fish into an excuse for heavy tackle or exaggerated catch promises.